Mikhmon Online Setup (Live Server) - Mikrotik Hotspot Server
000webhostapp.com hosting provides free webserver for those of you who are minimal budget like me. With this, we can make Mikhmon online without spending a single fee. But before we first download the mikhmon webserver file from here: https://laksa19.github.io/download.html or from here: Mikhmonv3 webserver. After the download is complete, complete the following steps:
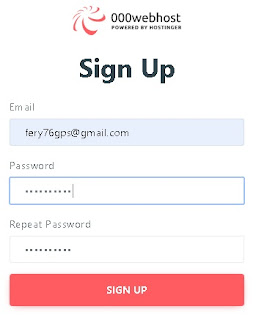
1. Open 000webhostapp.com and scroll down a little. Look to the left and select a package with zero fees, then click free sign up.

2. Register using a valid (original) email, because it will be needed to verify the email later.
3. Open your email, and look for an email from 000webhost.com. After you find it, open the email and click the "Click To Verify Email" button.

4. Then click the "Get Started" button

5. Then fill in your web name and password. When finished, click the "submit" button.

6. Then select "Upload your Site" by pressing the "Select" button.

7. On the next page, click "public_html" on the left. Then click the "Upload Files" button.

8. Then click the "Select Files" button. And find the location where the file Mikhmonv3 webserver is located. After you find the file click, then click the open button.

9. Press the upload button to upload the file "Mikhmonv3 webserver".

10. After finishing uploading, right-click the file "Mikhmonv3 webserver" and select extract.

11. Fill in the name of the folder where the file will be extracted, here for example: mikhmon.

12. After that we edit the file ". Htaccess" so that the login page of mikhmon immediately appears when we visit our webserver's domain. Right-click on the ".htaccess" file and choose edit.

13. Add the following code to the .htaccess file. Change the green letters with the name of your website. After that click the "save and close" button
RedirectMatch ^/$ https://mikrotiktest3.000webhostapp.com/mikhmon/mikhmonv3-master

14. Open your web address, here for example: mikrotiktest3.000webhostapp.com. If you leave the login page, you have successfully created the online web server. The username and password for the first time is the password while the password is "1234"

15. Follow this tutorial to be able to use DDNS if your public ip is dynamic:
http://learningbytutz.blogspot.com/2020/04/setting-ddns-on-huawei-hg8245h5.html
16. Follow this tutorial so that you can connect to your proxy:
https://learningbytutz.blogspot.com/2020/04/solusi-mikhmon-online-tidak-bisa.html
17. After everything is okay, it's time to connect the microphone to the proxy. Click the "Add Router" button on the left.

18. In the Session Setting, fill in the " Session Name " with the name you want, then fill in the Mikrotik Ip with the public ip or domain name that you got from no-ip.com. Then fill in your proxy username and password. Don't forget to fill in the HotSpot name and DNS name of the hotspot that you created. After all okay click the " Save " button.

18. Then click the " Connect " button , if successful the display will change as shown below.


Comments
Post a Comment